2.4.1 插入或修改图片
图标: ![]()
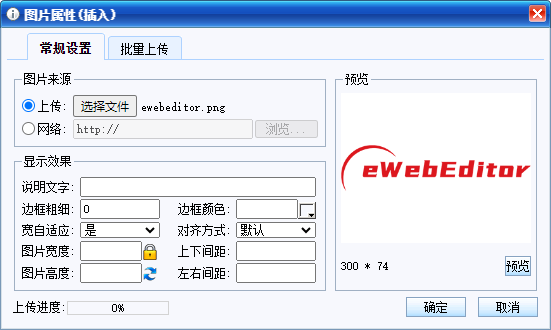
点击此按钮,将弹出下面的对话框。
如果先点选编辑区的图片,然后点击图标,将弹出上面的“图片属性(修改)”对话框。
要修改选定图片的属性,在上面的对话框中设置相应的值,然后点“确定”按钮。
图片来源:
eWebEditor自带有本地文件上传的功能,即能把客户端计算机上的图片传到服务器,使得内容发布后,其它客户端也可以看到此图片。
有两种途径可以设置图片的来源,一种是直接输入图片URL,一种是通过点”浏览”按钮选择本机的图片文件。当从本机选择一个图片文件后,点确定后,此本机图片将自动上传到服务器,并关闭此图片属性对话框。
预览:
点击“预览”按钮,可以在预览区看到,你在图片来源处选择或输入的图片的等比缩放的预览效果。并会显示此图片的宽度和高度。
如果点击“预览”按钮,在预览区没有看到图片效果,请检查,可能你的图片地址输入有误。